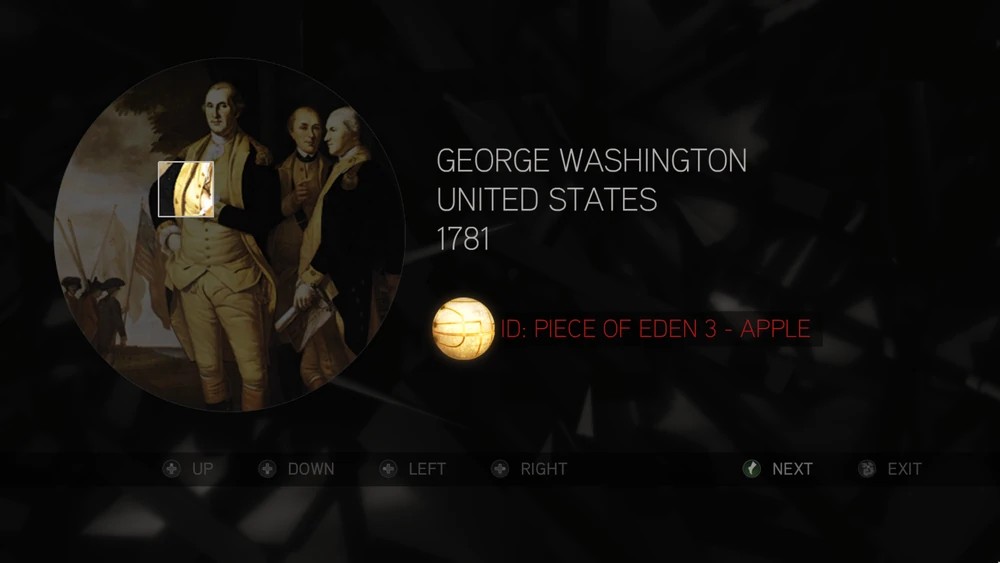
Following Netflix’s confirmation of the Assassin’s Creed adaptation, many gamers have revisited the video game series in anticipation of the upcoming series’ big premiere. For those of you who are discovering or rediscovering the Ezio Auditore saga, here is a guide to all the glyphs and puzzles in Assassin’s Creed II.
Assassin’s Creed II contains a total of 20 glyphs scattered across all the locations that Ezio Auditore (the protagonist) visits. These glyphs are not part of the main storyline; however, they reveal “the truth” a side quest more closely linked to Desmond, the protagonist in the Animus.
These glyphs represent hidden, encoded information that Subject 16, Desmond’s predecessor, managed to decipher at Abstergo during his time there. The information was later stolen by Lucy inside an external memory device and implanted into the Animus held by the Assassins.
It is time to learn the truth.
Glyph location in Assassin’s Creed II
Florence
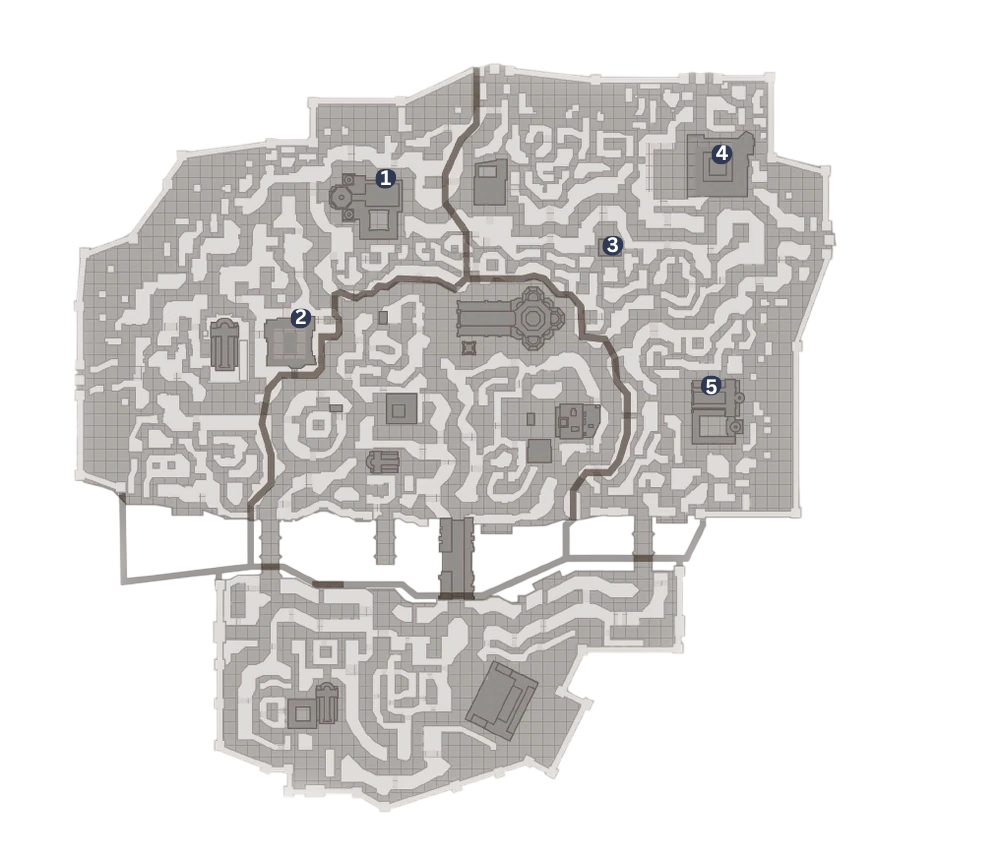
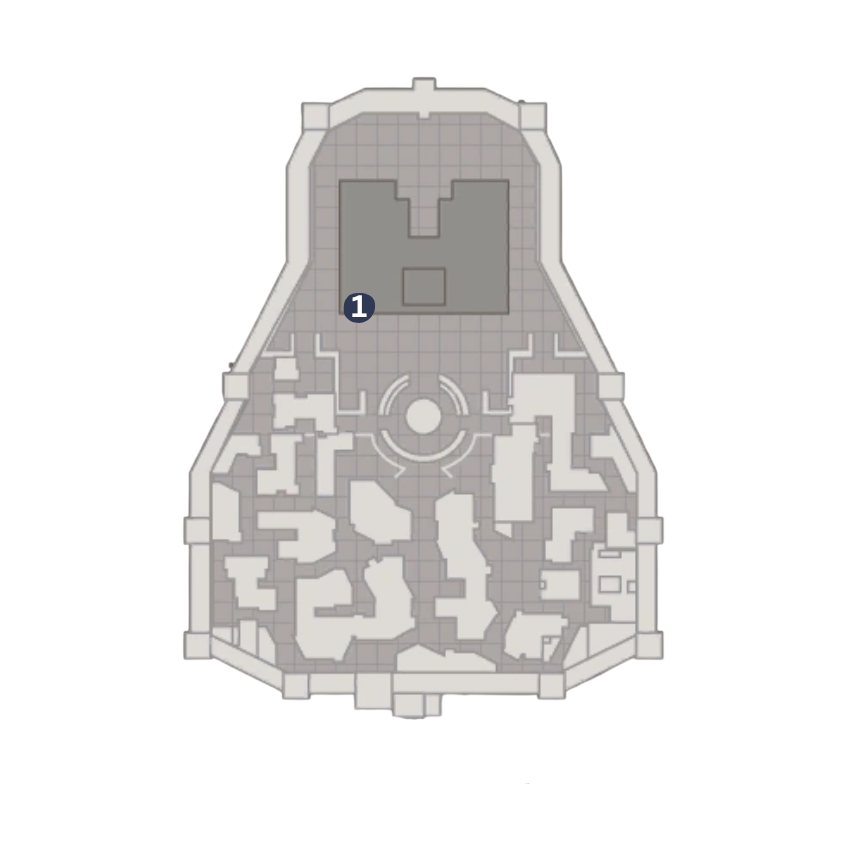
- San Lorenzo: Between the bell tower and the dome you’ll find the glyph , on the tower’s southern wall.
- Mercato Vecchio: On the low roof at the northeast corner of the Mercata and look for the glyph on the eastern side.
- La Rosa Colta: Facing La Rosa Colta’s front door, climb the façade to the roof. You’ll find the glyph on the roof’s second tier.
- Ospedale degli Innocenti: On the eastern side of the Ospedale’s roof, the glyph is on the wall of the second tier roof.
- Santa Croce: Climb up onto the north side of the lower roof. The glyph will be on the belltower wall.
Monteriggioni
- In Villa Auditore, while facing the front door, walk left to the last window. The glyph is on the upper left corner of the façade.
Tuscany, San Gimignano
- On the end of the cloister hallway on the left-side of the Sant Maria Assunta church.
- In the gap between the towers at Torri Dei Salvucci. You’ll find the glyph on the left wall.
- Climb up the Torre Dei Diavolo. The glyph is on the highest point of the tower.
- In the tunnel of the Antico Teatro Romano. The glyph is on the left wall.
- At the base of the tallest tower in the Monte Olivetto Maggiore abbey.
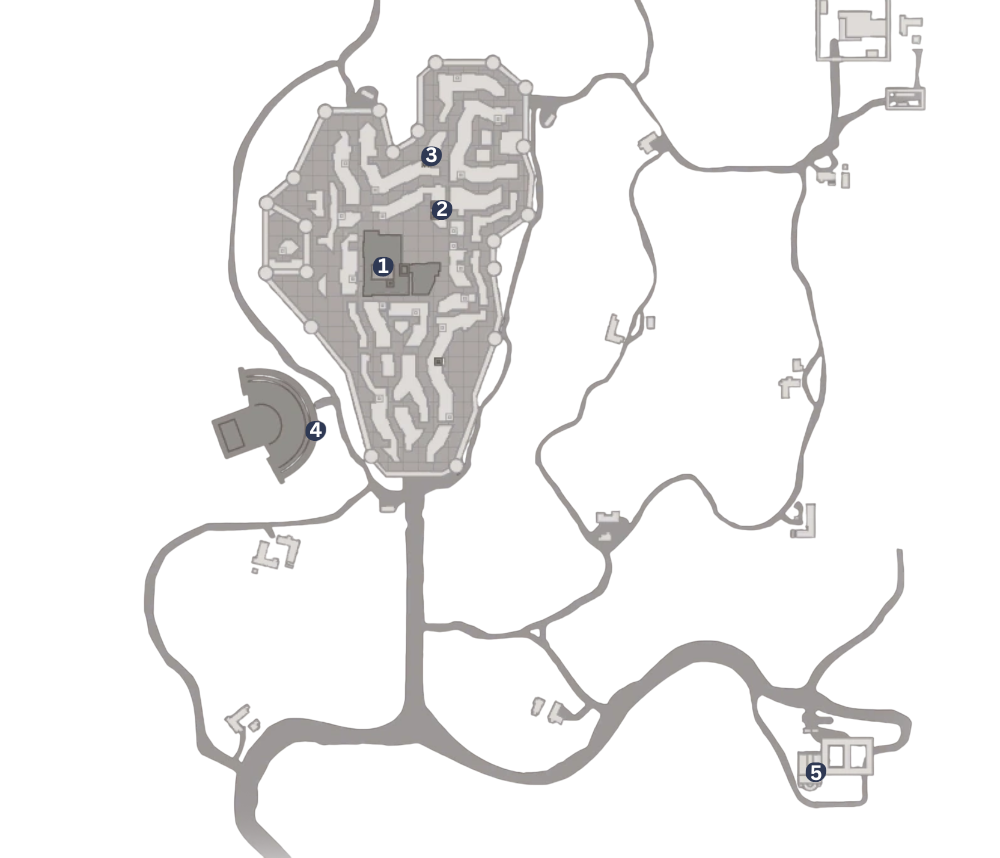
Forlì
- Climb the tower of Avamposto Veneziano. The glyph is on the top section of the wall facing the sea.
- In Abbadia San Mercuriale’s Court yard, you’ll find the glyph above one of the archways to the right of the tower.
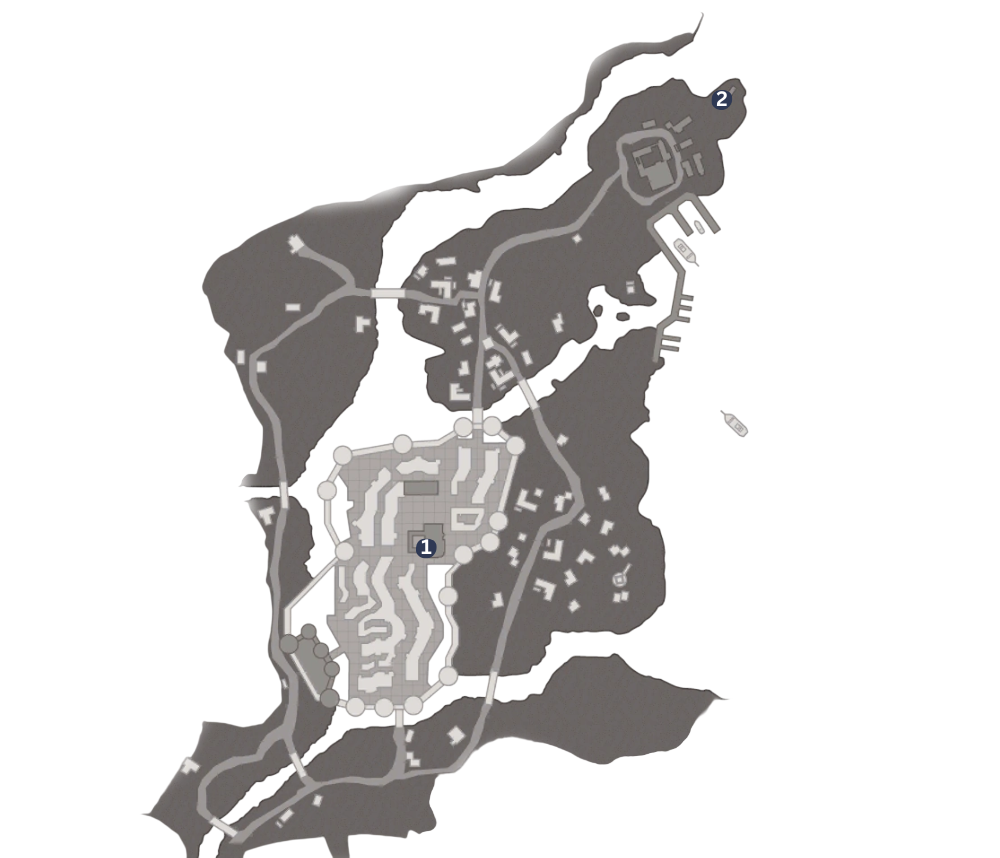
Venice
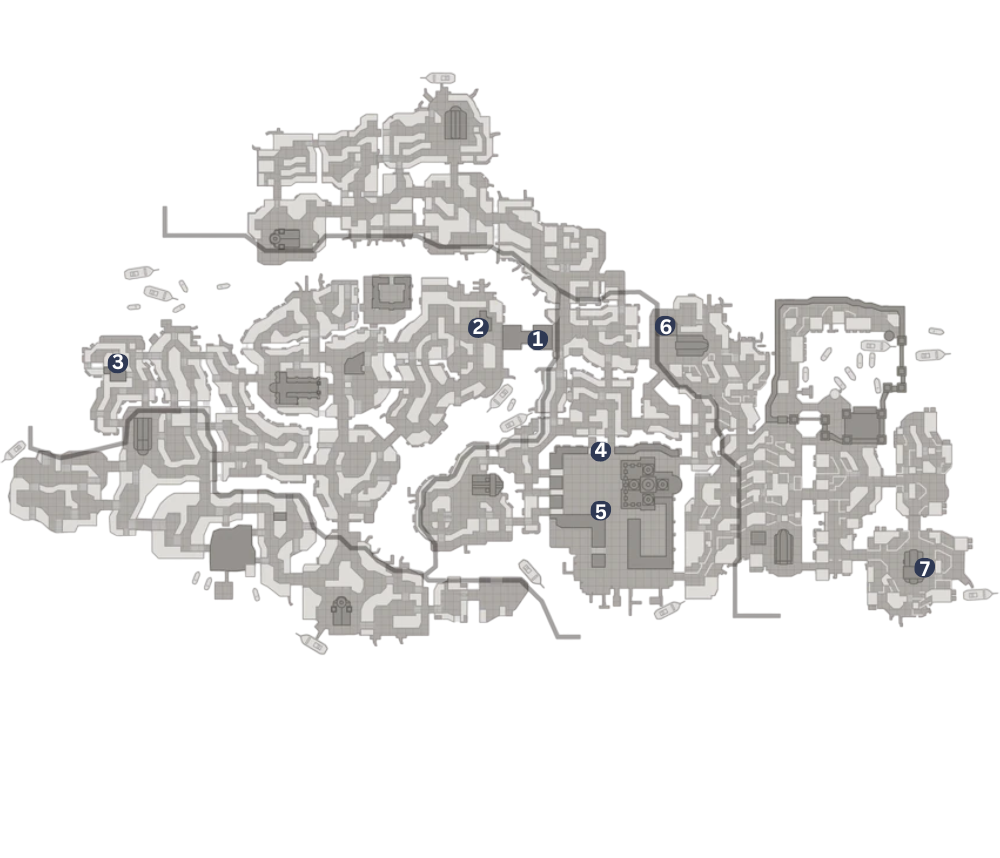
- Under the Ponte di Rialto, swim under the wood beams and you’ll find it on one of the walls.
- On the first building on the left side of the Ponte di Rialto. At the top of the building you’ll find a small dome with a statue. On one of the walls under it you’ll find the glyph.
- Climb onto the rooftop of the Gilda dei Ladri di Venezia, you’ll find the glyph at the side of a window.
- Climb onto the rooftop of the Torre dell’Oroligio. You’ll find the glyph on the rooftop.
- Across Piazza San Marco climb onto the rooftop of the Campanille di San Marco. You’ll find this glyph on the floor inside the Campanille.
- Climb onto the Scuola Grande di San Marco’s white building. You’ll find the glyph behind the arch of the roof.
- On the eastern side of the roof of San Pietro di Castello.
Glyph Puzzle Solutions in Assassins Creed II
All puzzles in Assassin’s Creed II are resolved in numerical order, regardless of the glyph order chosen by the player. This means that even if you discover the glyphs by accident at the near end of the story, you can resolve them at any stage of the game.
Here you have a guide to solve all the puzzles in Assasin’s Creed II:
Puzzle 1
“FIVE OF THESE MYTHIC SCENES SHARE A CORE SIMILARITY. PICK THEM OUT AND YOU’LL BEGIN TO SEE.”
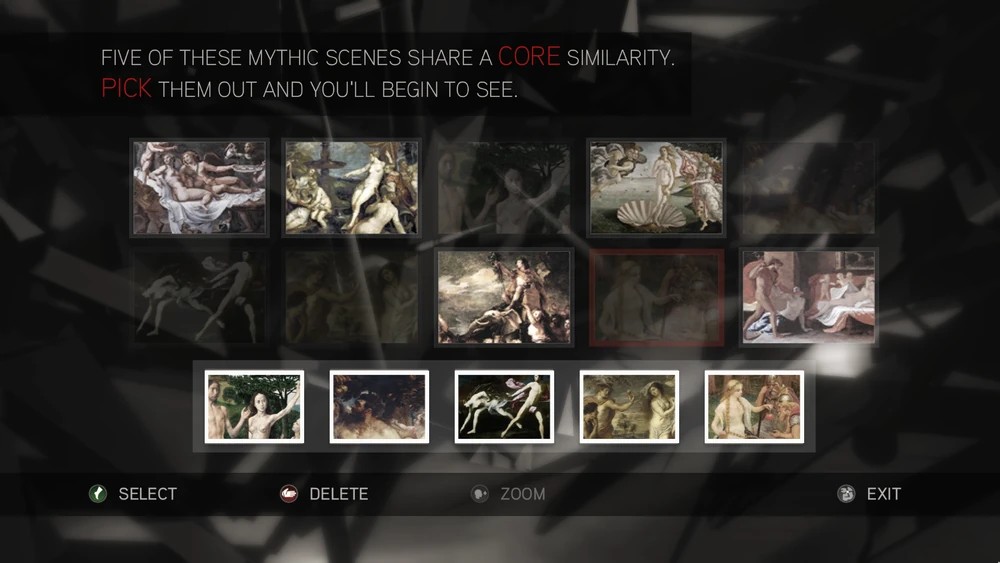
Solution: Select all the images that contain apples, that is the core similarity between them.
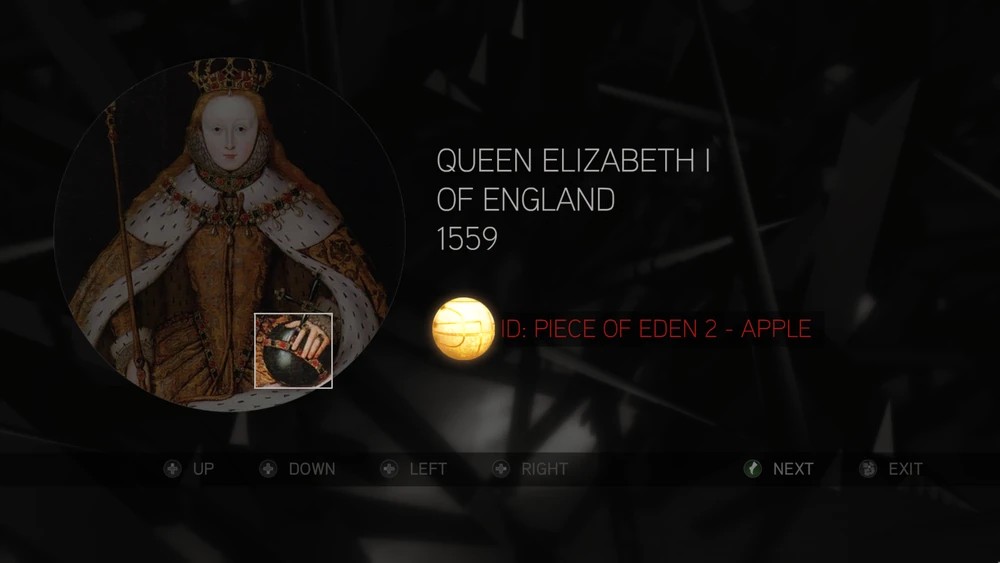
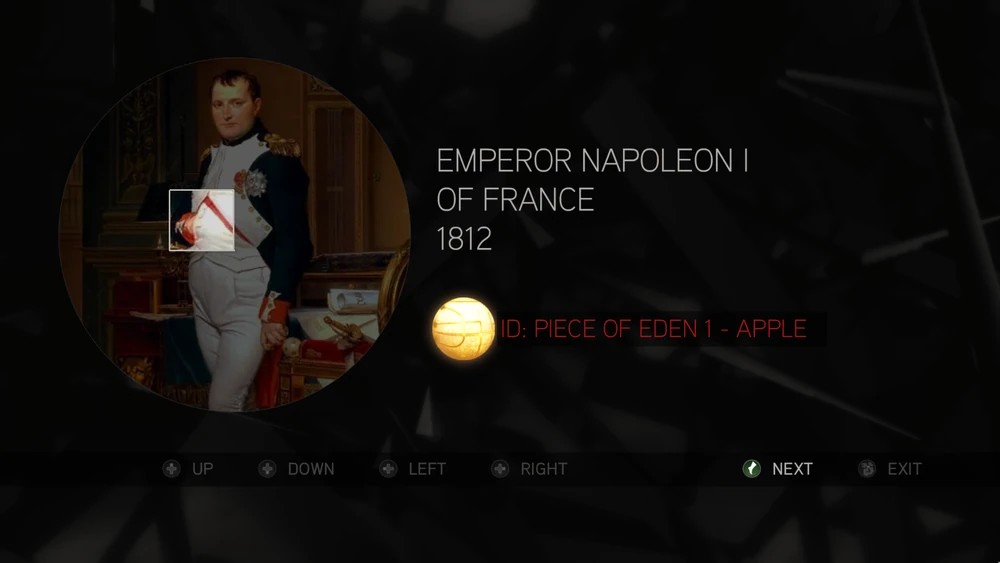
Puzzle 2
The second puzzle is a series of three mismatched puzzles. The center of the puzzle is already set and can serve as a guide for the rest of the image. You’ll have to rotate the discs to get the image right. In this puzzle the rings are independent of each other.
Puzzle 3
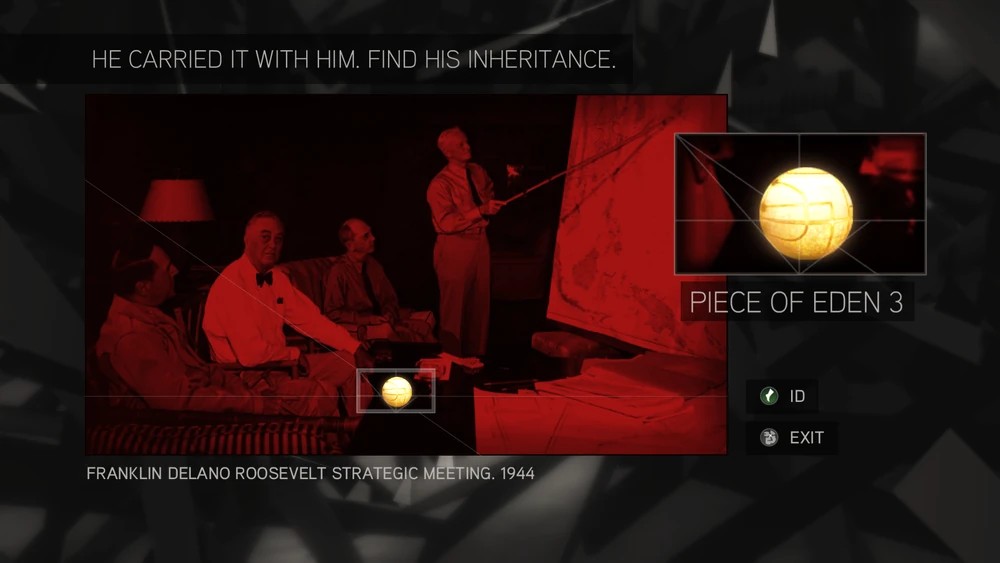
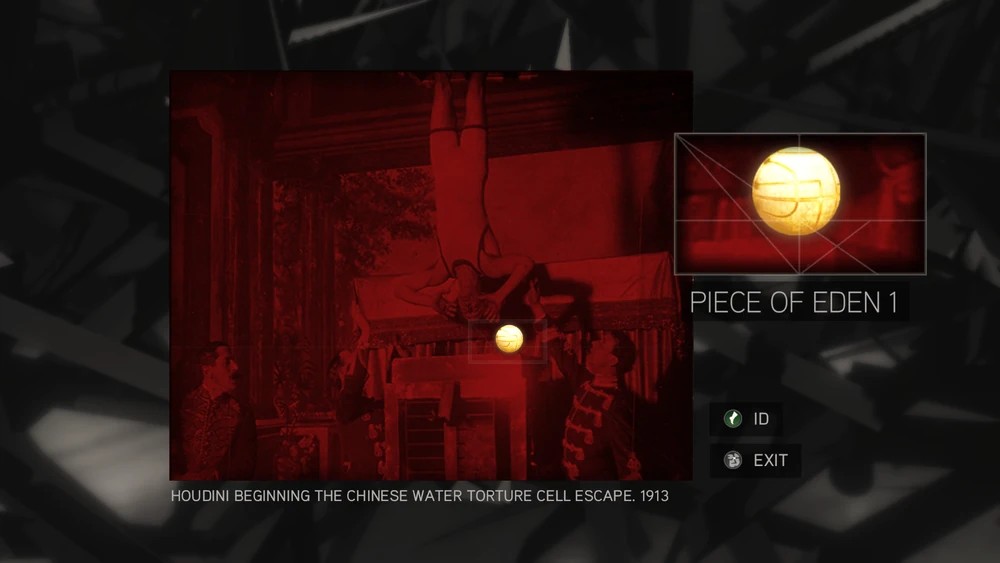
“HE CARRIED IT WITH HIM. FIND HIS INHERITANCE”
- Franklin D.Roosevelt: On the black board there’s a cipher that reads “The Masons brought it across the sea. George Washington passed it on.” The piece of Eden is at his feet.
- Harry Houdini: Above his feet there is a morse cipher that reads “They hit him in the stomach”. The piece of Eden is on the tank below Houdini’s head.
- Mahatma Gandhi: There’s a hidden morse cipher in the photo that reads “The bullet hit him in the chest”. Gandhi has the piece of Eden in his clothes.

Puzzle 4
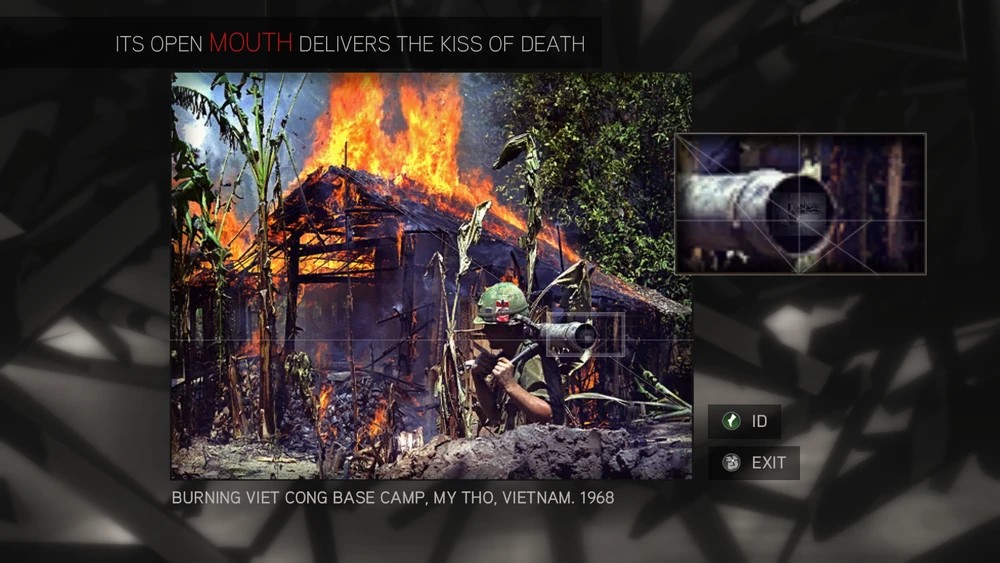
You must locate the hidden piece in every photo. Each photo will be titled by a riddle to locate the hidden answer.
- First image: “ITS OPEN MOUTH DELIVERS THE KISS OF DEATH” it refers to the “mouth” of the soldier’s bazooka.
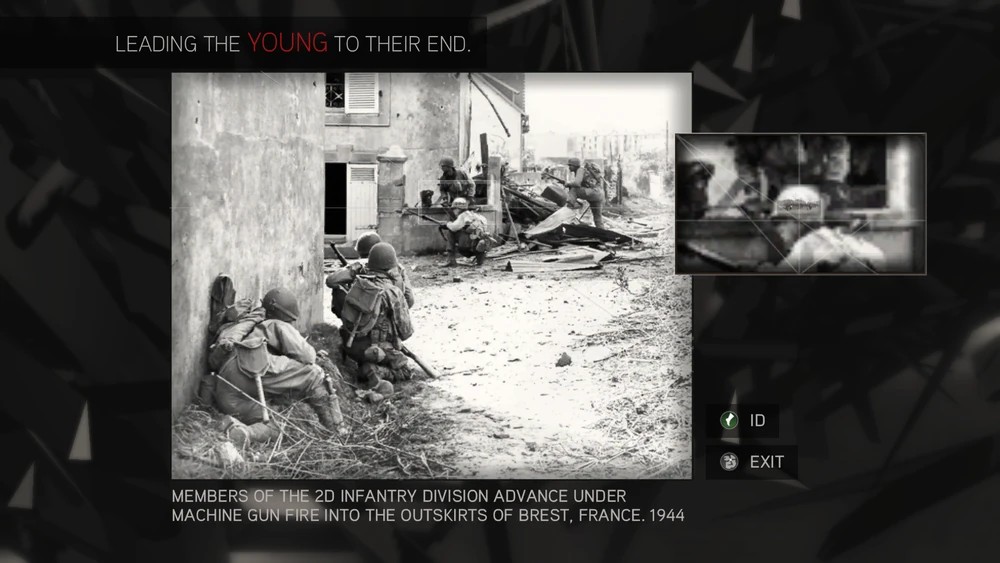
- Second image: “LEADING THE YOUNG TO THEIR END”. As it “leads” the soldiers, zoom in the soldier’s helmet that seems more exposed to the fight.
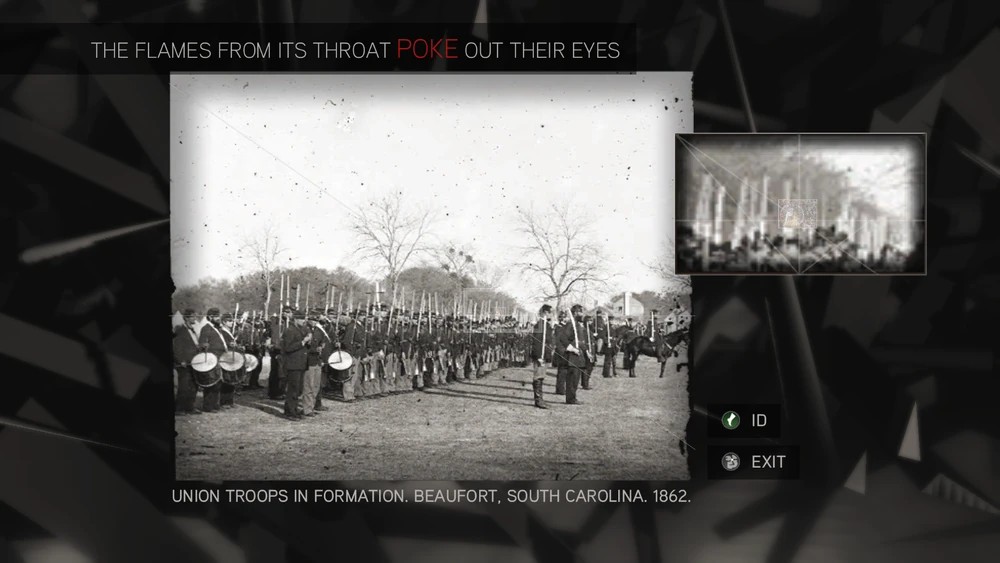
- Third image: “THE FLAMES FROM ITS THROAT POKE OUT THEIR EYES” Zoom in on the first line of soldiers, to the weapons.
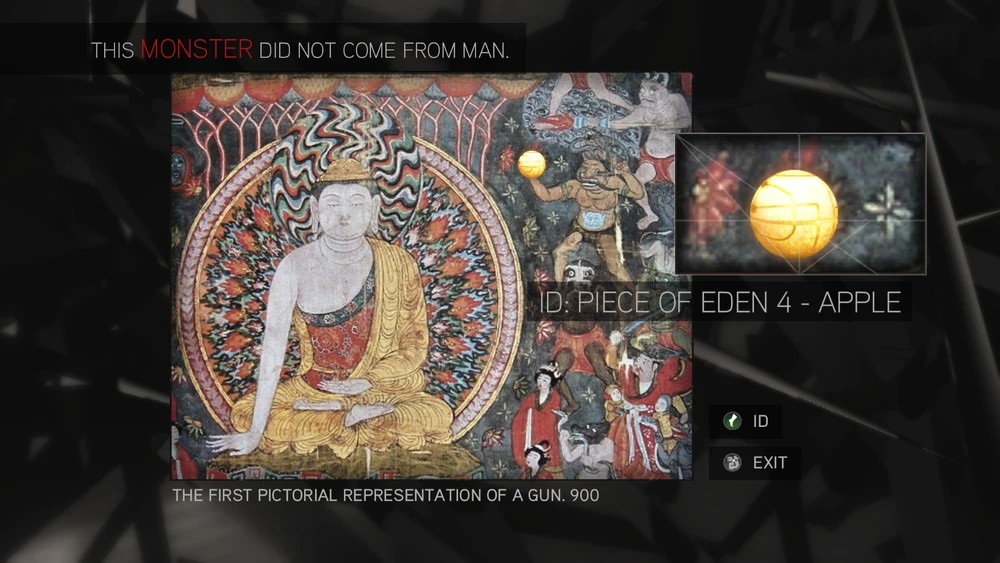
- Fourth image: “THIS MONSTER DID NOT COME FROM MAN” The demon on the upper right-side has his hand stretched and has the piece of eden on it.
Puzzle 5
Like in the first puzzle, you’ll have to select five images that have an item or them in common.
- First image: “THE POWER THEY WELDED CUT DOWN THEIR ENEMIES”. Select all 5 images with swords in them to unlock the Piece of Eden 25.

- Second image: “IN THEIR HANDS THE WISE LEAN ON A GREAT FORCE”. Select five images with a staff to unlock the piece of Eden 34.

Puzzle 6
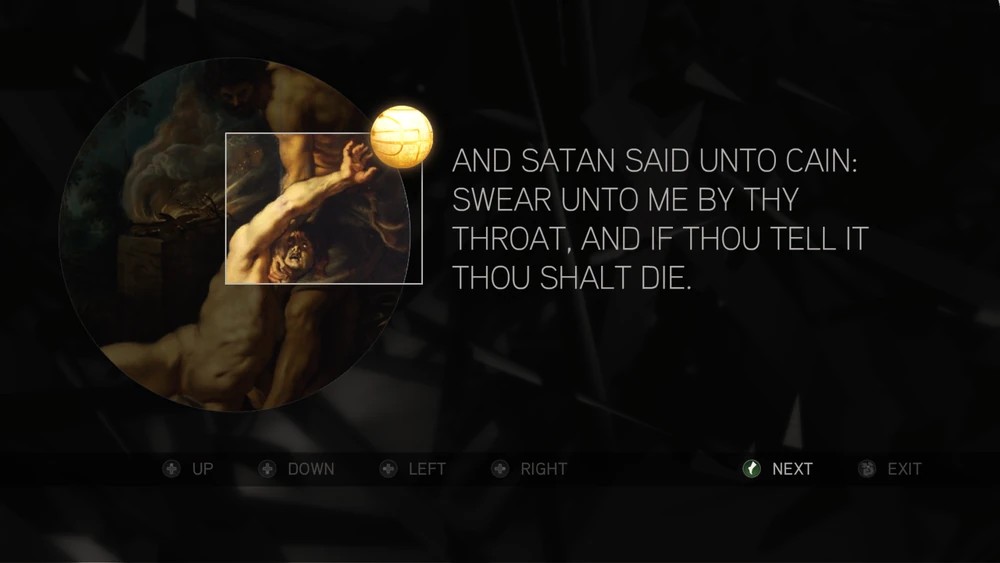
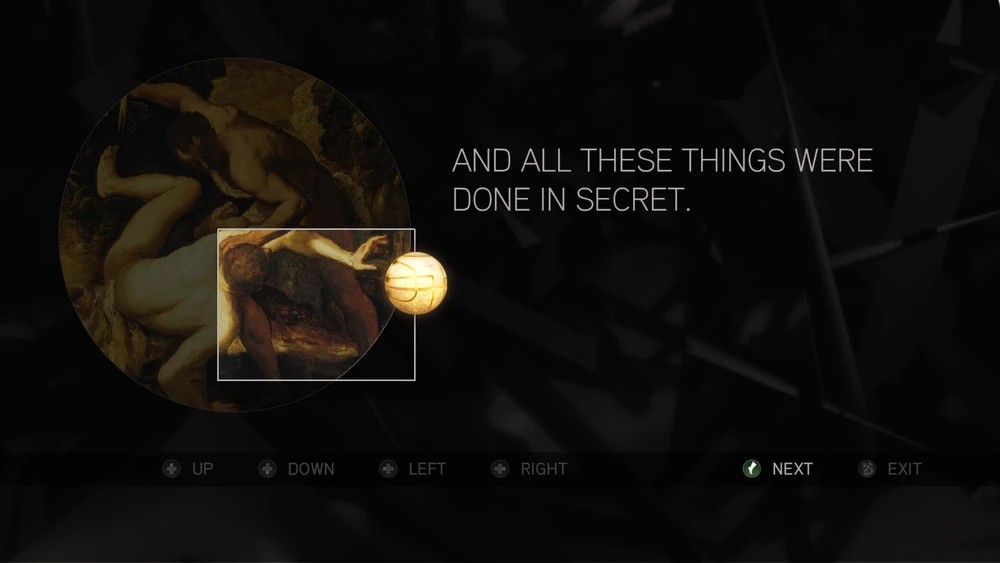
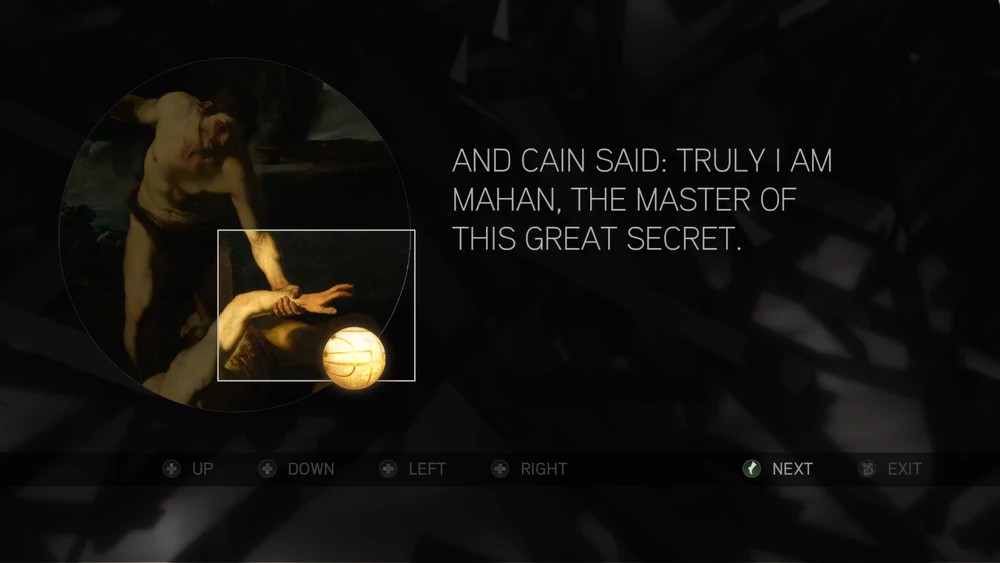
Similar to puzzle two, you’ll have to rotate the rings to see the final image. This set of three puzzles are composed of paintings from Cain and Abel.
- First painting: rotate ring one two times to the left, then ring two three times to the left, Ring four is next and must rotate once to the right. Ring five three times to the right, and ring three around to complete the image.
- Second painting: rotate ring one three times to the left, then ring three once to the left. Ring four has to rotate four times to the left, ring five once to the right, and ring two around to complete the painting.
- Third painting: rotate ring one three times to the left, ring three once to the right. Then ring four five times to the left, ring five once to the left, and ring two around to complete the image.
Puzzle 7
This puzzle contains two challenges. The first puzzle requires you to select five images that share something in common. The heading for this challenge reads:
“FIRST PLUCKED FROM A TREE GUARDED BY A SNAKE, ITS POWERS PERFORM MIRACLES. THEN, WORN ACROSS THE AGES, TORN ASUNDER, HIDDEN UNDER A SEA OF RED, RECONSTRUCT THE TIMELINE.”
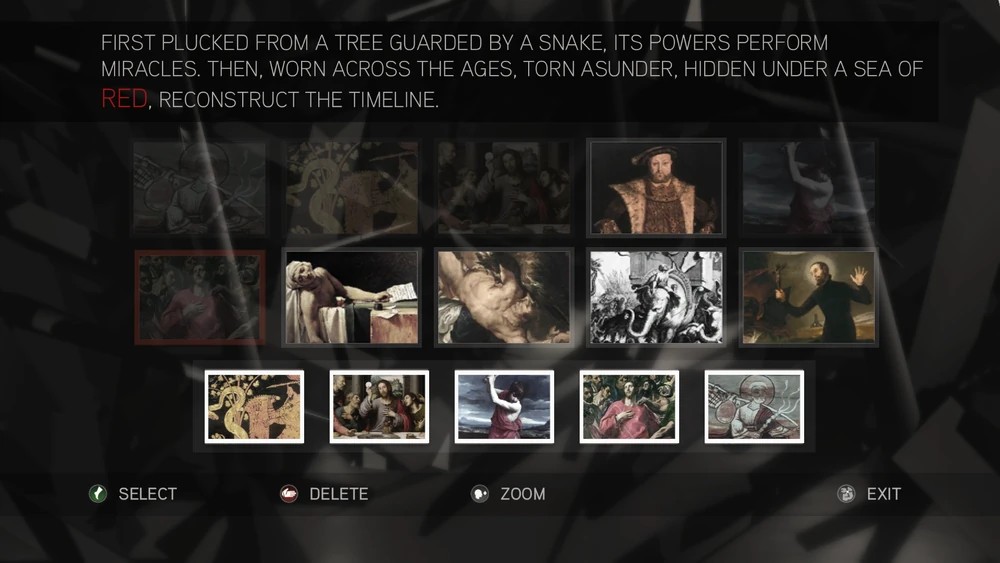
Solution: Select all the images containing the red shroud.
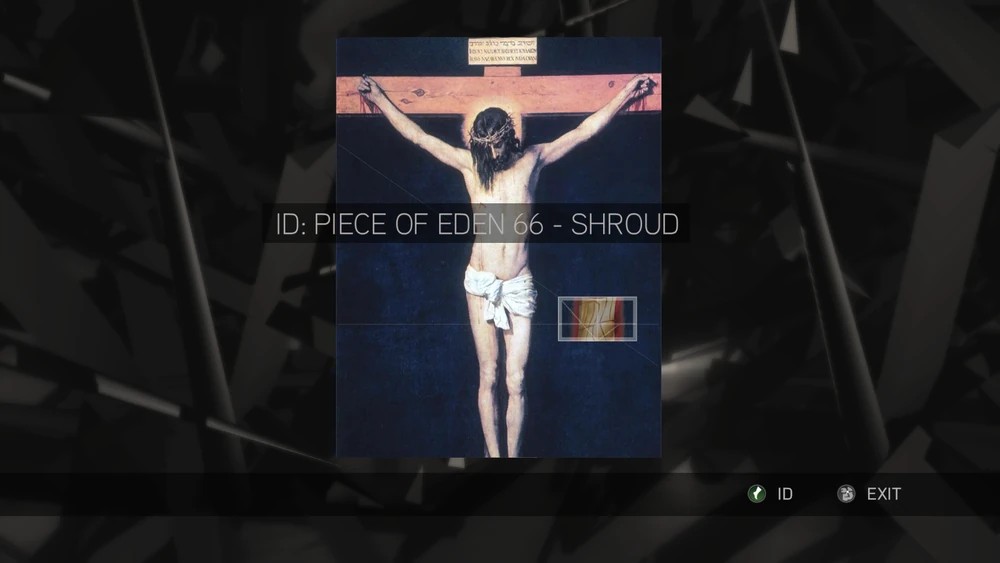
The second puzzle involves scanning a painting of the crucified Jesus of Nazareth. To find the piece of Eden 66, zoom in to the lower right-hand side of the painting, below Jesus’ hip.
Puzzle 8
The first phase for this puzzle will show you two images in which you’ll have to locate a piece of Eden, using the sonar signals.
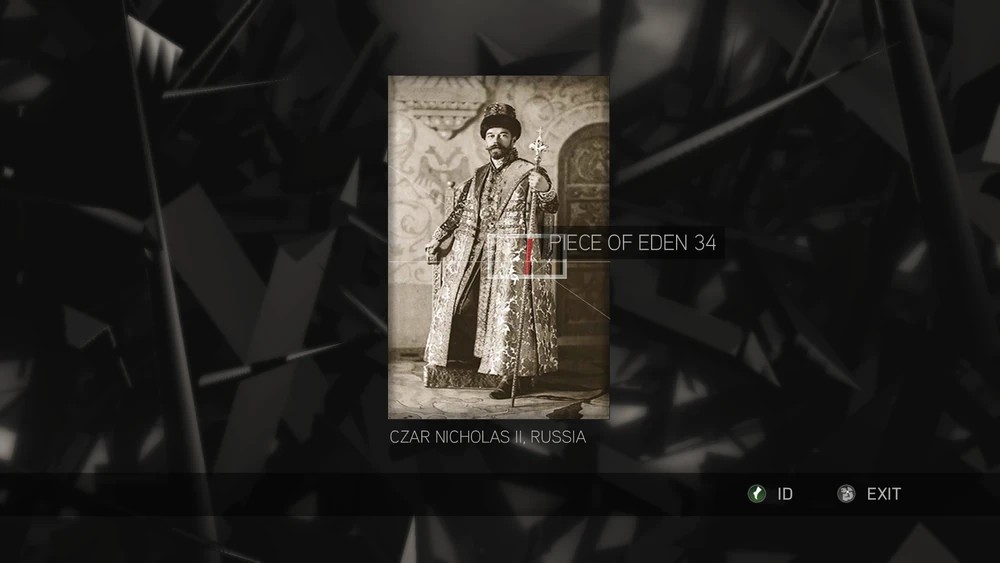
The first image is from Czar Nicholas II of Russia. The piece of Eden 34 is located in his staff.
The second image is a painting from Joan of Arc. The piece of Eden 25 is located in her sword.
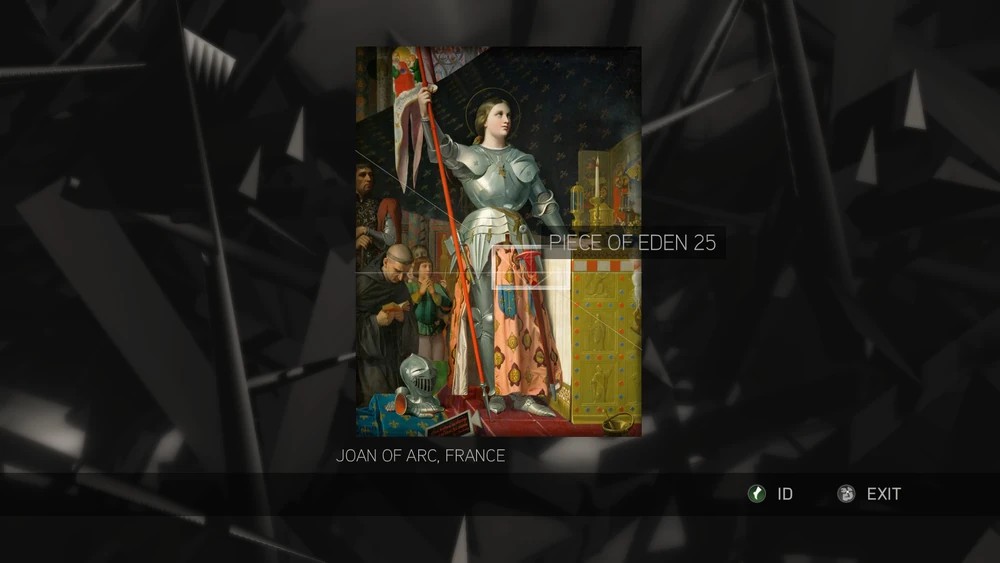
For the second phase, match the fire symbol with Joan of Arc’s painting, second Rasputing and the Czar’s picture last.
Puzzle 9
This puzzle also contains two phases. During the first one, you’ll need to find a piece of Eden in each photo.
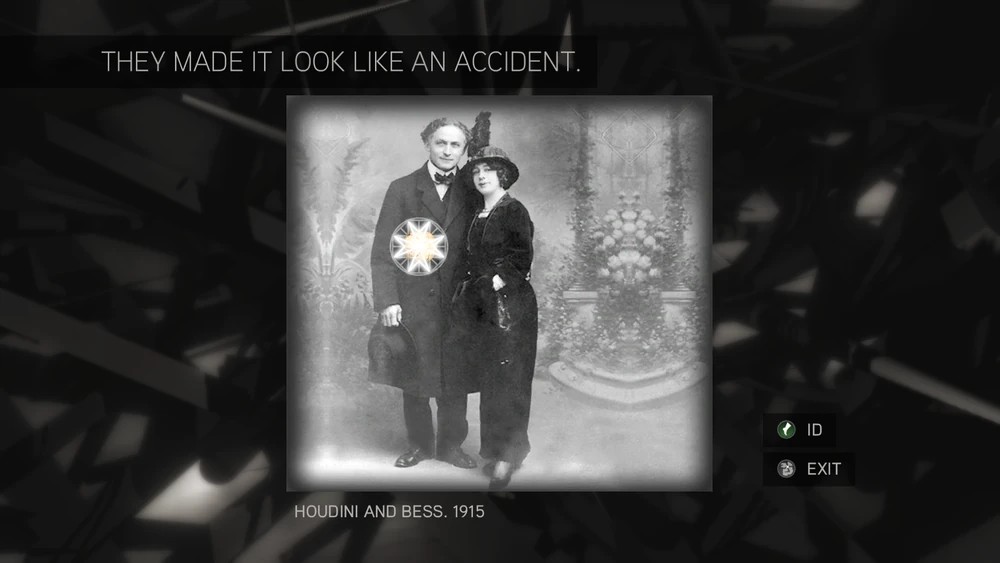
The first image reads “THEY MADE IT LOOK LIKE AN ACCIDENT”, and shows Houdini and Bess in 1915. The Piece of Eden is inside Houdini’s coat.
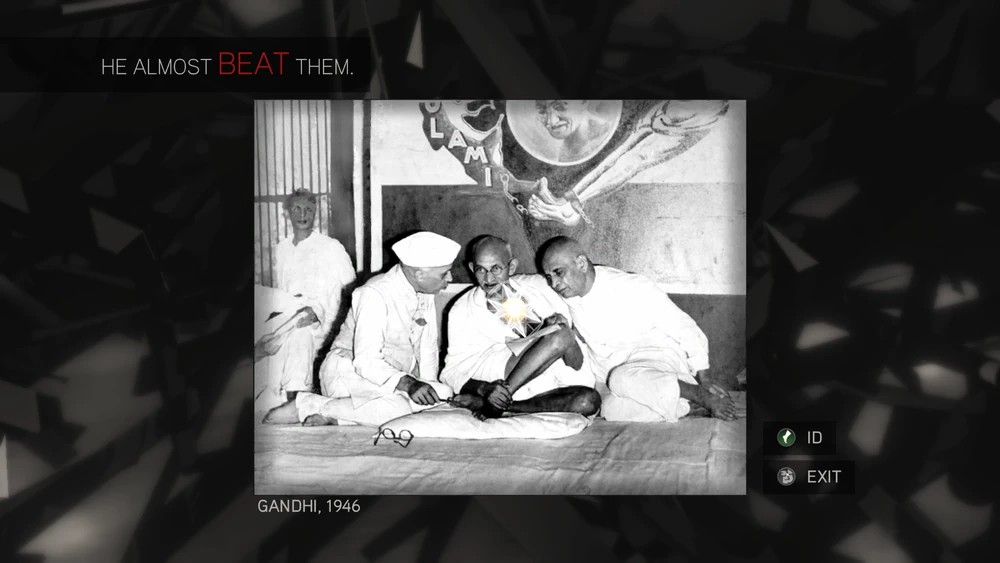
The second image shows Gandhi and reads: “HE ALMOST BEAT THEM”. The piece of Eden is located on Gandhi’s collarbone.
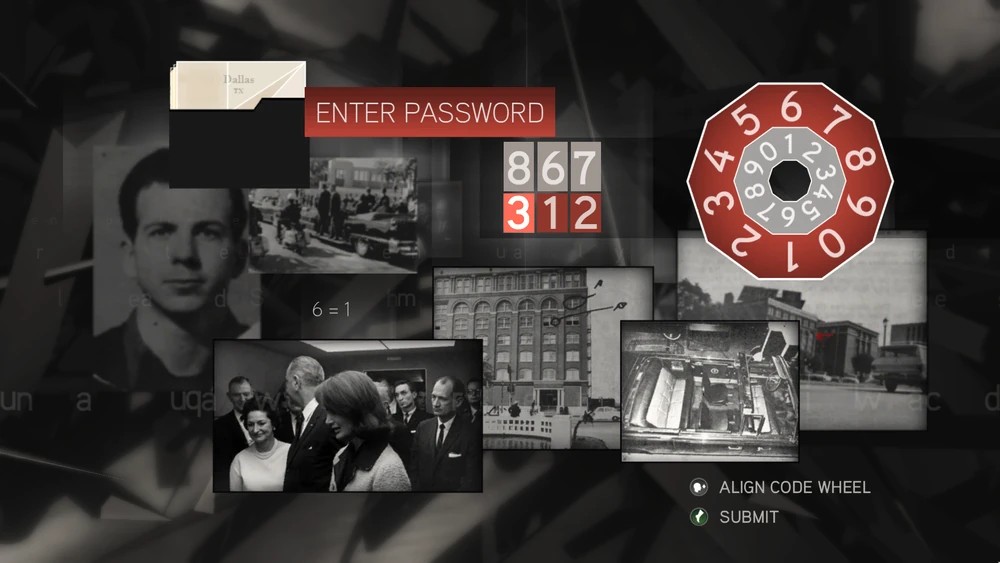
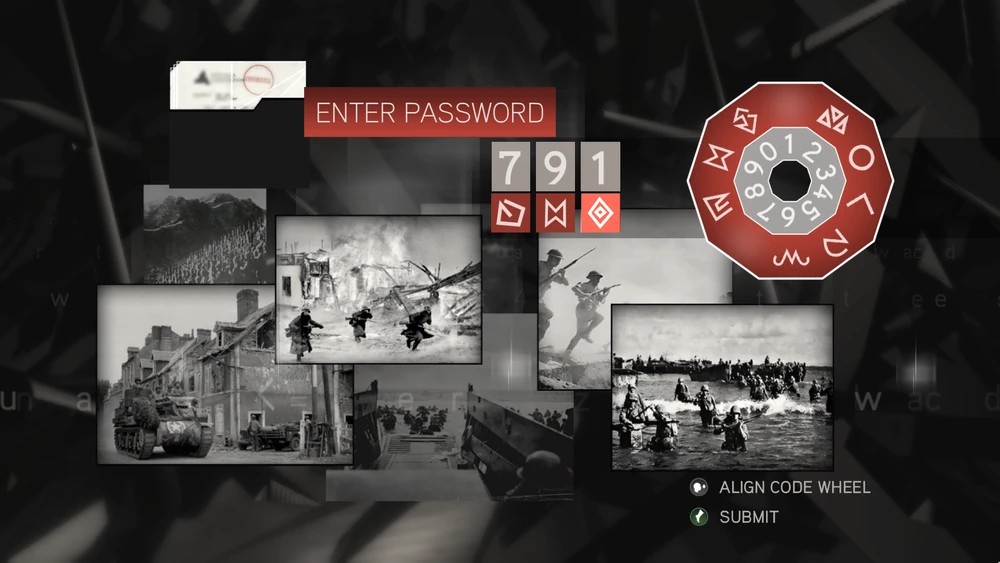
The second phase of this puzzle is a Caesar cipher. This puzzle will show a selection of pictures, and two wheels of numbers which need a code to enter the password. Between the picture you’ll find the solution code:
6 = 1
Match the wheels to fit the code and enter the password below the grey numbers. The code is 312.
Puzzle 10
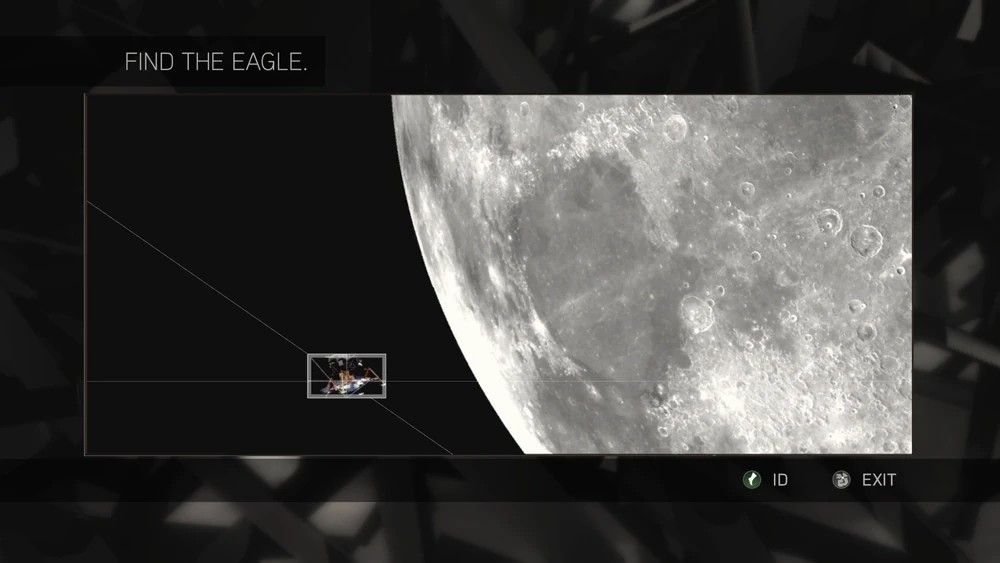
For the first phase of this puzzle you’ll need to “FIND THE EAGLE”. It is on the lower left side of the image, next to the moon. Once you find it, click on the red dot to proceed to the next phase.
The second phase of the puzzle is a wheel puzzle. To solve it you’ll have to: Turn the second outer ring four times to the left, turn the third ring to the left five times. Then, turn the joined pieces to the right three times. Lastly, turn the innermost ring to the left four times.
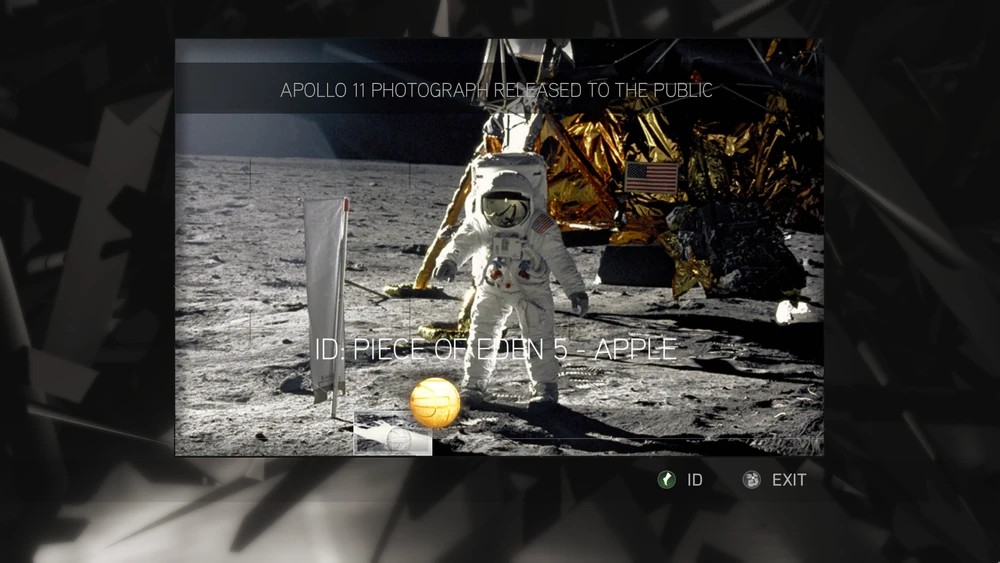
The third and final phase of this puzzle shows a photograph from the Apollo 11 mission released to the public. Move the cursor following the sound and you’ll find the piece of Eden at the left foot of the astronaut.
Puzzle 11
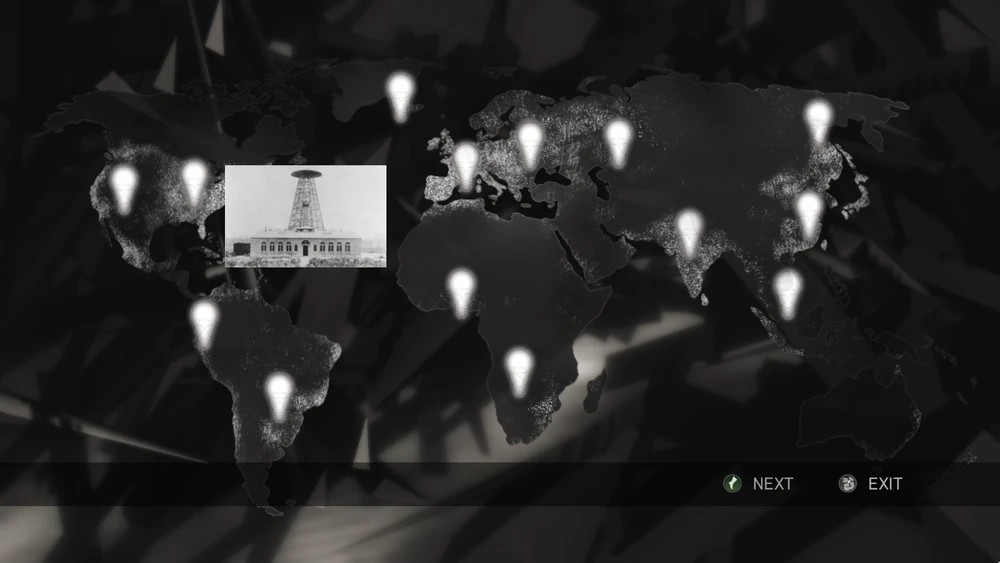
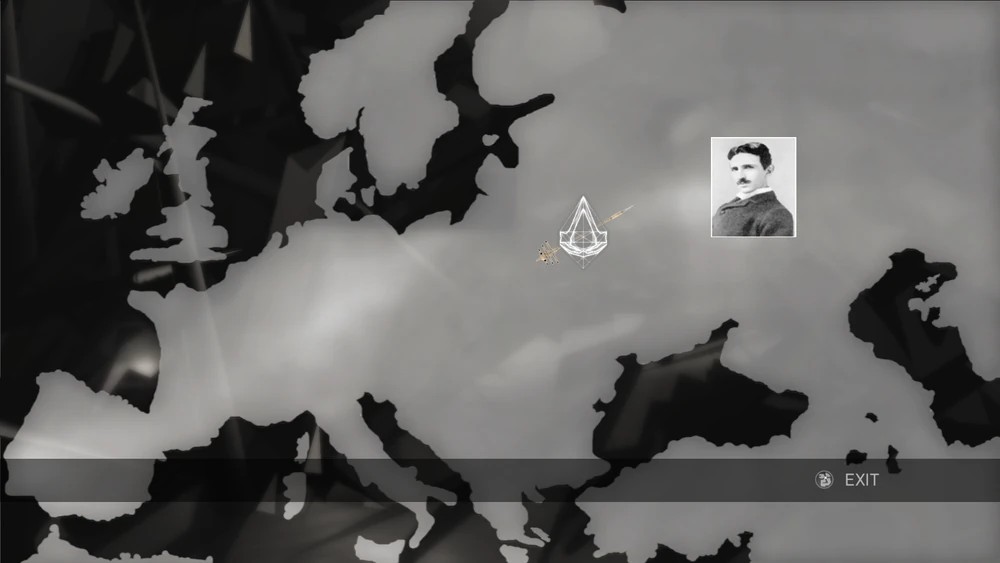
For the first phase of the 11th puzzle you’ll have to light up all the light bulbs on the map to begin the next phase.
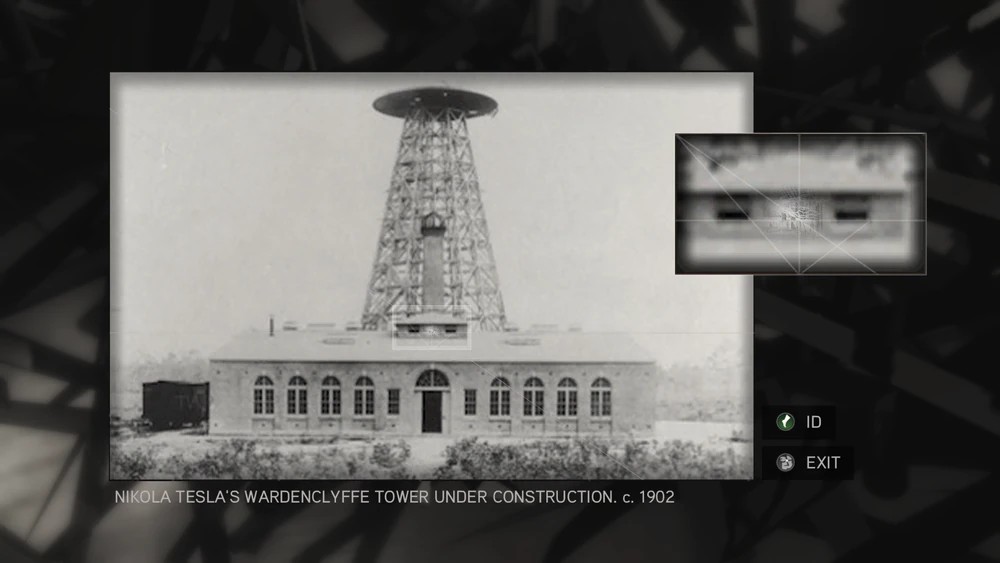
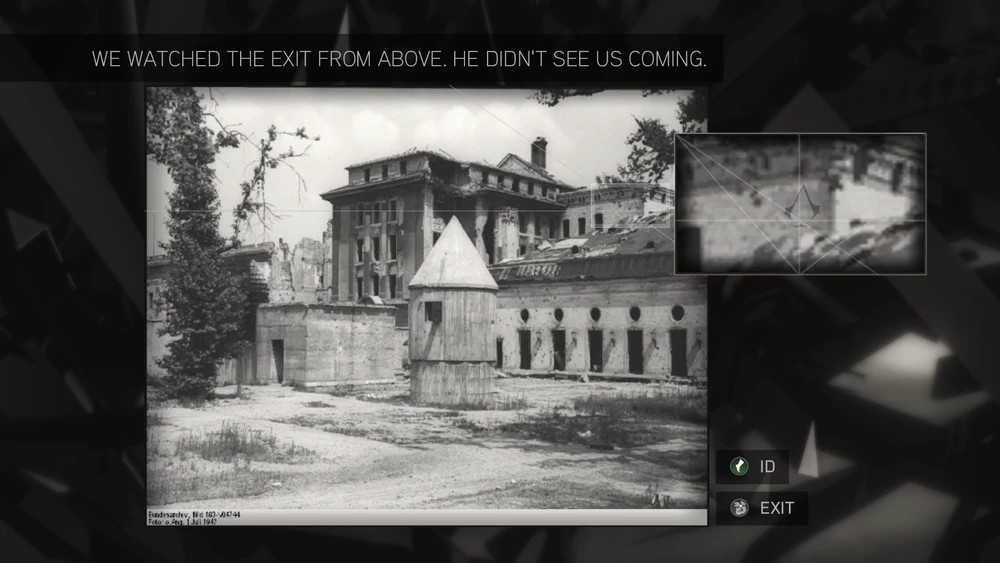
For the next phase you’ll have to find the glyph in the picture. Move the cursor to the space between the two upper windows on the second roof.
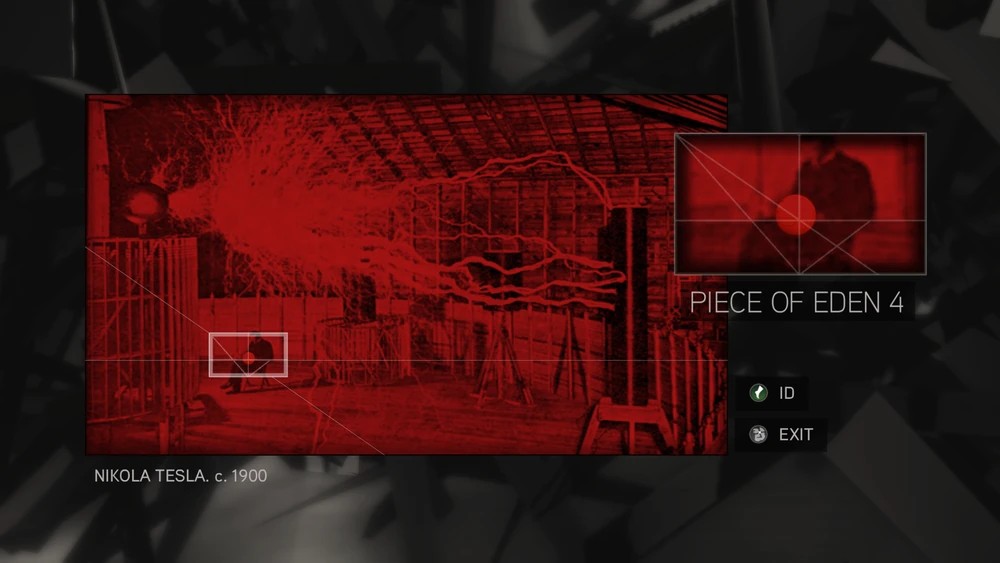
For the third phase you’ll have to find the piece of Eden in the image of Nichola Tesla. The piece of Eden is in Tesla’s hands.
Puzzle 12
Following Nichola Tesla, the next puzzle will need a password to be solved. You see a selection of photos and two wheels of numbers to get the password. In the sketch in the left corner you’ll find the code:
4 = 1
Match the wheels to fit the code and enter the password below the grey numbers. The code is 240.

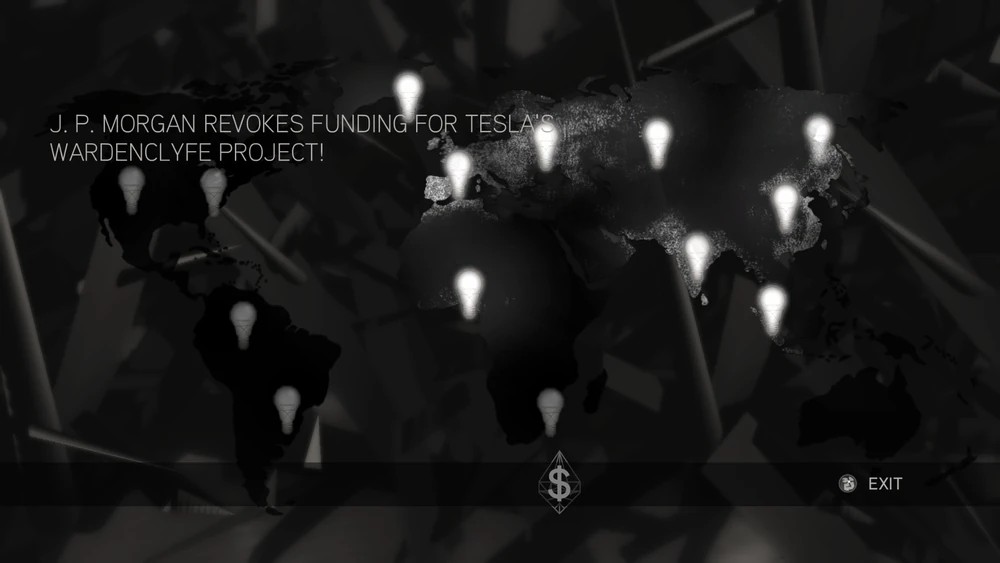
For the next phase, turn off all the light bulbs on the world map.
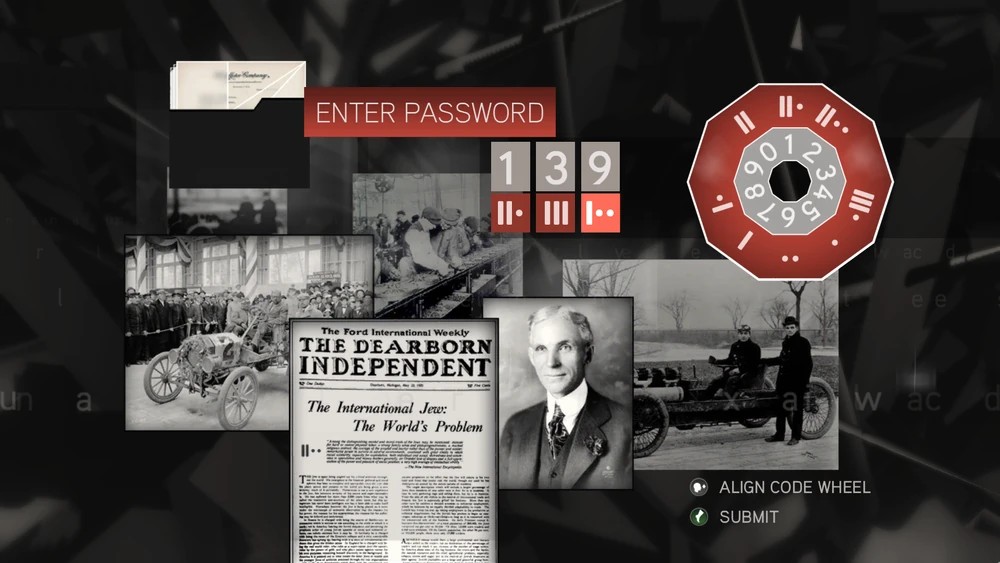
For the third phase there is another wheel puzzle to get a password. Look at the photos, you’ll find the number 2 on the racing cards and ||·· on the newspaper picture.
2 = ||··
Match the wheels to fit the code and enter the password below the grey numbers. For this puzzle you’ll have to follow the logic to fill in the gaps on the wheel.
The code is: ||·, |||, ||··
Puzzle 13
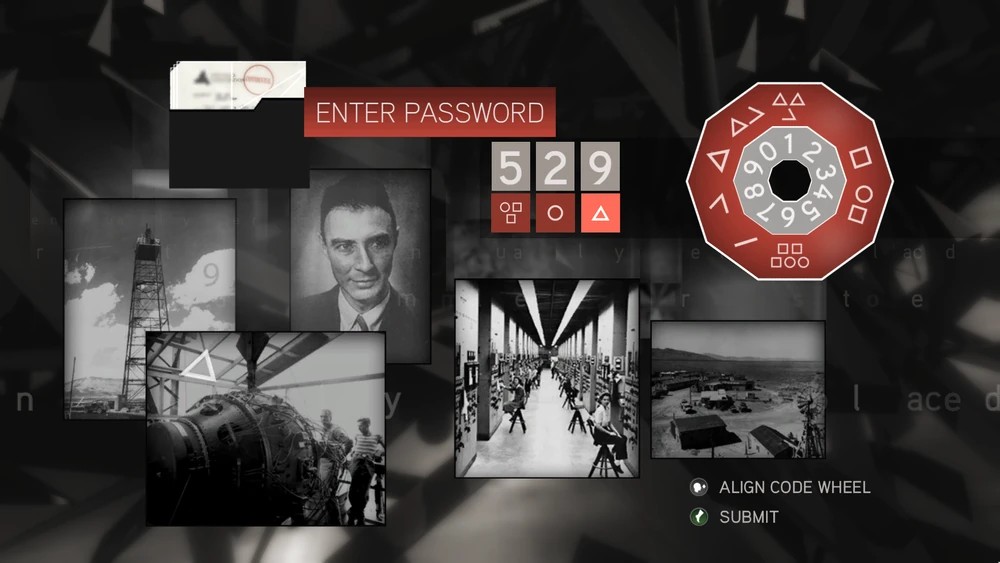
During the first phase of this puzzle you’ll need to find the password in the photos displayed, then match the wheels with the number and shape to find the password.
You’ll find a 9 on the tower picture and a triangle in the picture below.
9 = △
Match the wheels to fit the code and enter the password below the grey numbers. For this puzzle you’ll have to follow the logic to fill in the gaps on the wheel.
The code is: 〇☐☐, 〇, △
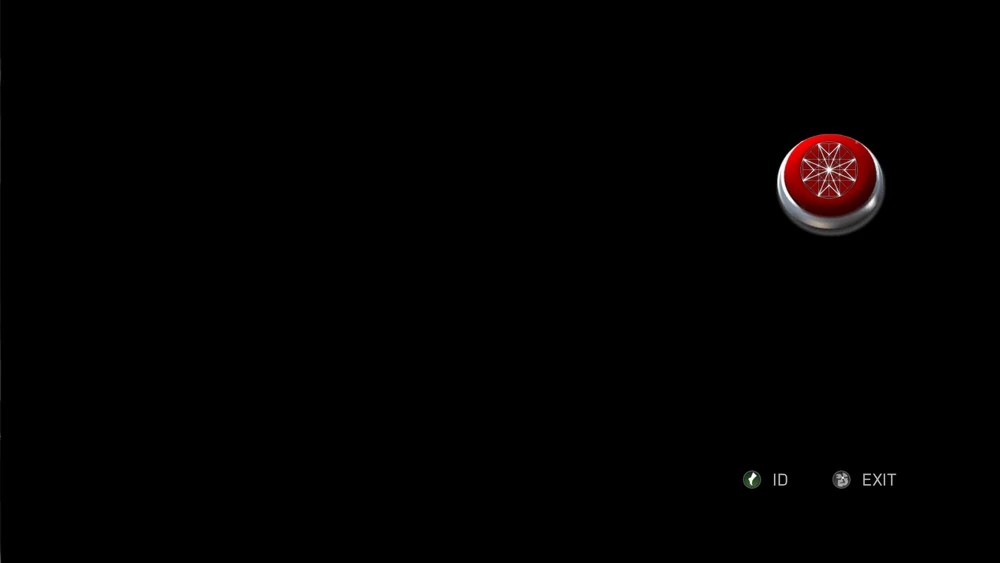
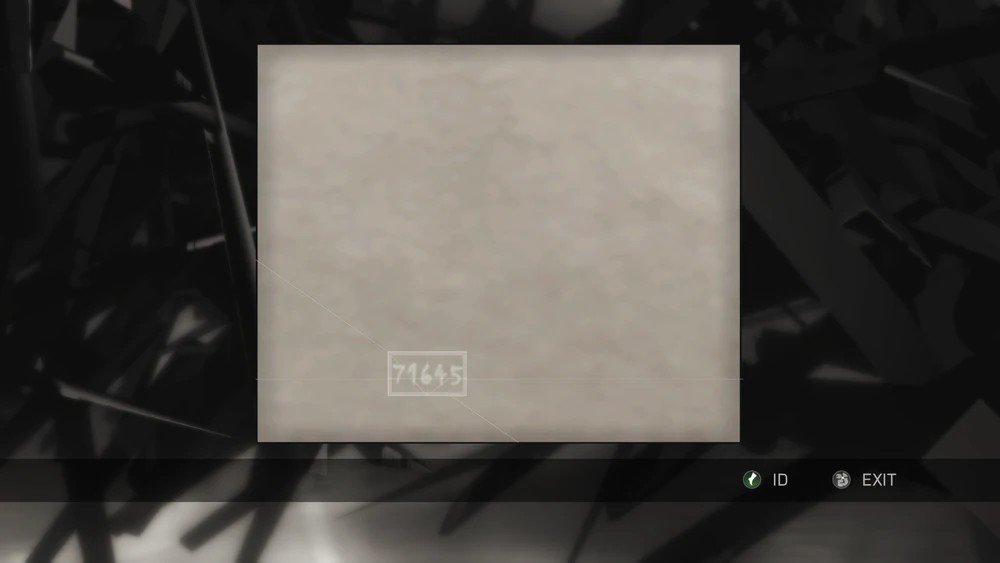
For the next phase, press the red button and after the recording of the atomic bomb test, move the cursor to find the code on the bottom of the image.
Puzzle 14
Puzzle 14 has just one phase. A challenge to select five images out of ten. The challenge reads: “ THE SEEDS WERE PLANTED AS TWO WORLDS BECAME ONE. BEHOLD, THE ASSASSINS ARE CHILDREN OF TWO WORLDS!”
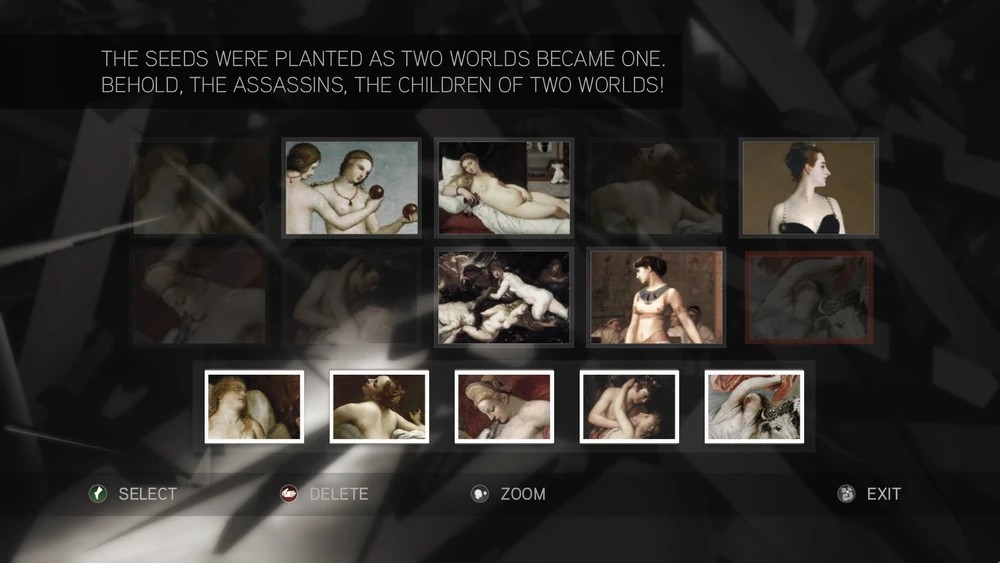
Solution: Select all paintings that portray a union of gods and mortals.
Puzzle 15
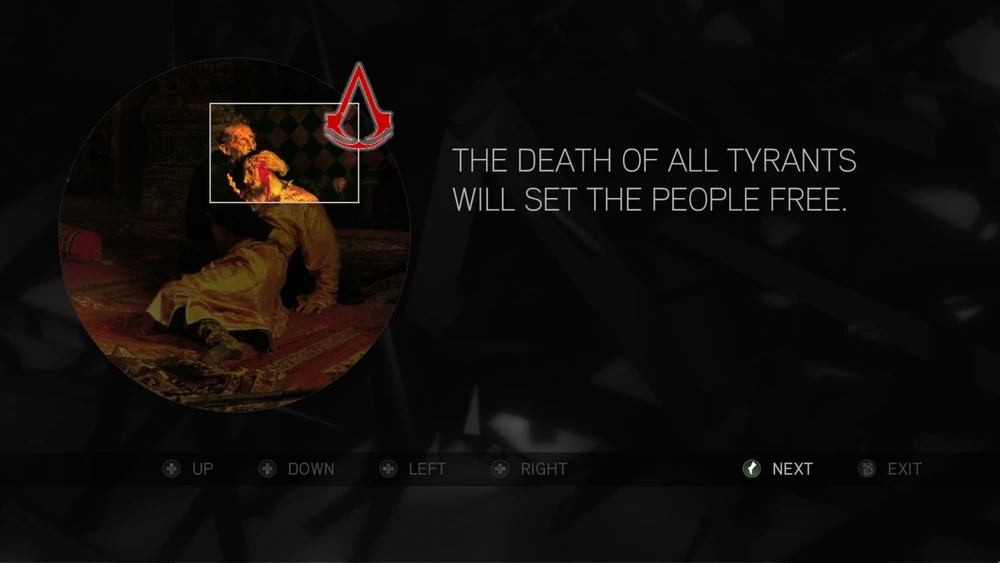
For puzzle 15, the first challenge is another rotating puzzle. The text in this challenge reads “ THE DEATH OF ALL TYRANTS WILL SET THE PEOPLE FREE.”
To solve this image you must: turn the second outermost ring left five times, the third ring twice to the right. Then, turn the fourth ring right five times, the second ring twice to the left. Finally, turn the first ring once to the left.
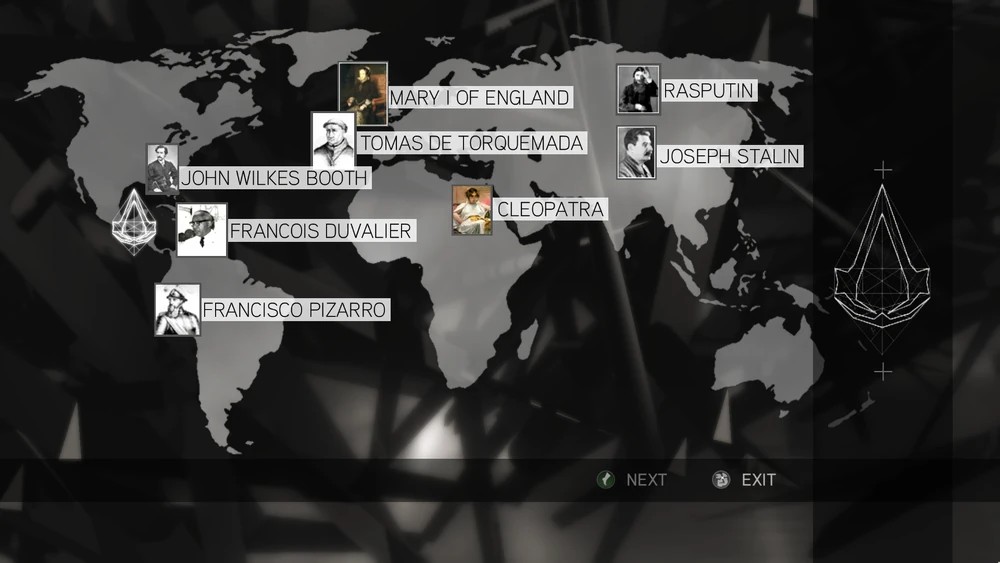
For the next phase of this puzzle click on all the dots on the map to unlock the next file.
Puzzle 16
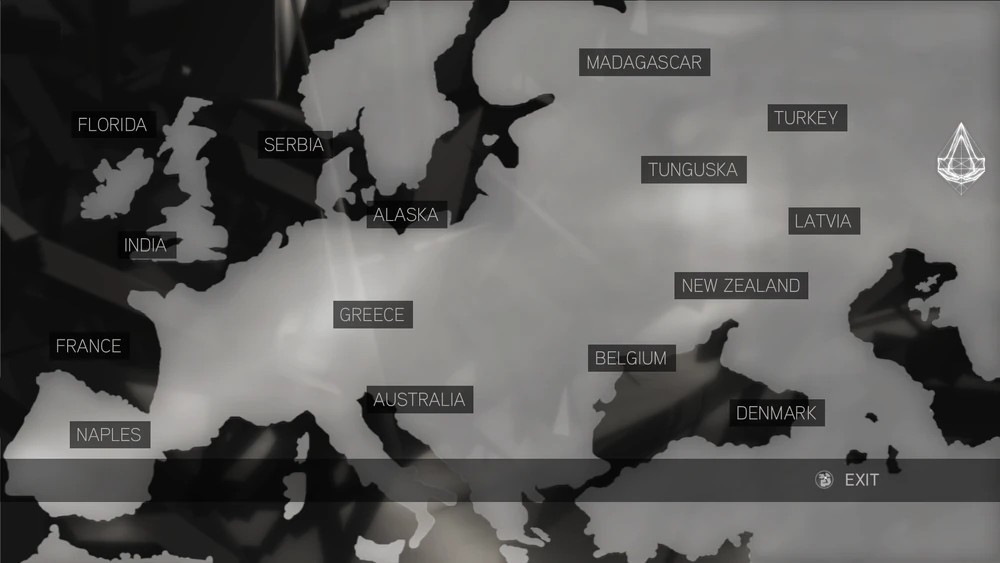
This is one of the shortest and easiest puzzles of the game. Move the cursor to Tungguska on the map and then to Nichola Tesla.
Puzzle 17
For the first phase of the 17th puzzle, we have another coded password. For this one, you’ll find the < symbol in the photo on the bottom left. in this puzzle the code is:
< = 4
Match the wheels to fit the code and enter the password below the grey numbers. For this puzzle you’ll have to follow the logic to fill in the gaps on the wheel.
For the second phase you’ll have to search for the assassin’s creed logo in the photo. The symbol is on the right side on the second rooftop of the building.
Puzzle 18
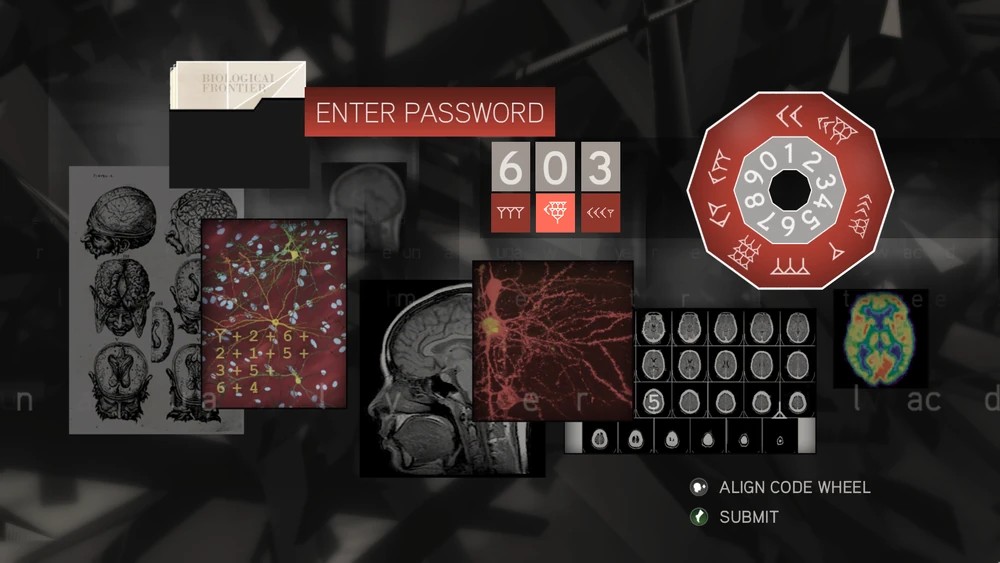
For the first part of this puzzle is another Caesar cipher to obtain the password. You can find the code in the brain scan image. The number 5 is on the first brain from the left, in the bottom row, the symbol is between the two last brain scans on the right, also in the bottom row.
Match the wheels to fit the code and enter the password below the grey numbers. For this puzzle you’ll have to follow the logic to fill in the gaps on the wheel.
For the second part of this puzzle, move the cursor over all synapses.

Puzzle 19
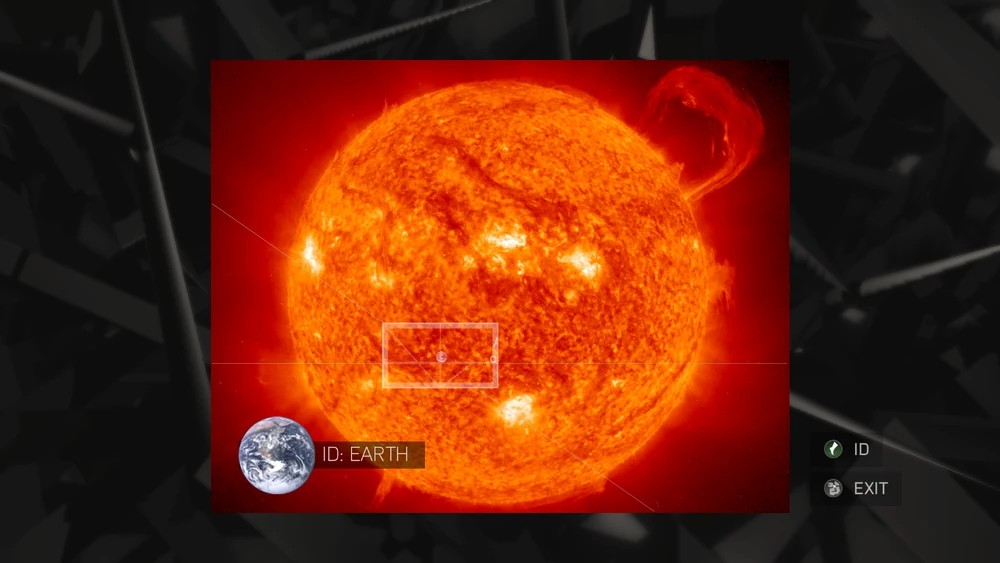
The first part of this puzzle reads: “ ONCE WORSHIPPED, NOW IGNORED. FROM A DISTANCE IT WATCHES AND WAITS.” Select five images from the ten shown in this puzzle that have something in common.
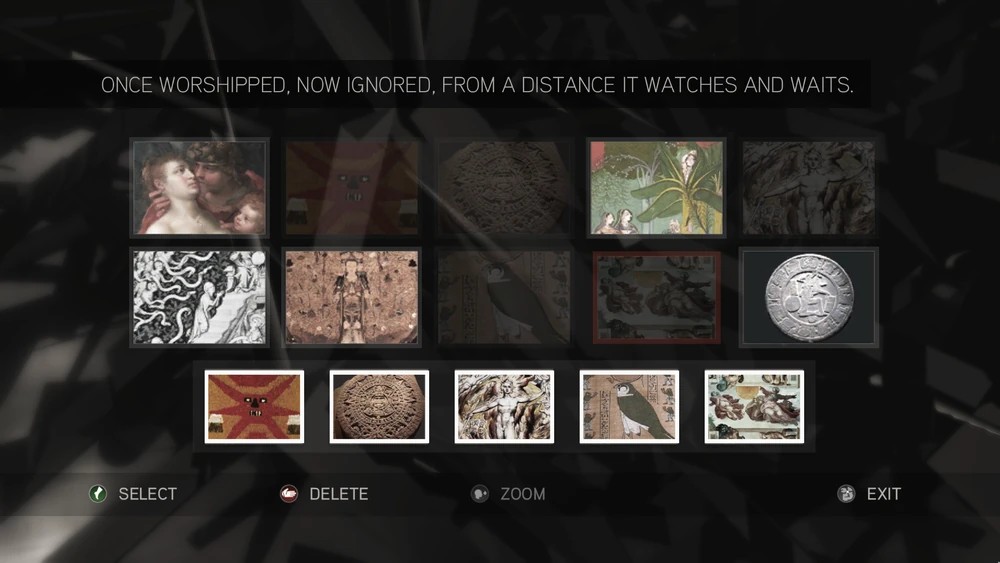
Solution: Select all the paintings containing the sun.
For the second part of the puzzle you’ll have to find the Earth in the image. Move the cursor to the lower left from the center of the picture.
Puzzle 20
The first phase of the last puzzle is a rotation puzzle. To solve it: Turn the outer ring twice to the left and the second inner ring five times to the right. Then turn the second outermost ring twice to the left and the third ring twice to the right. Lastly, turn the innermost ring three times to the left.
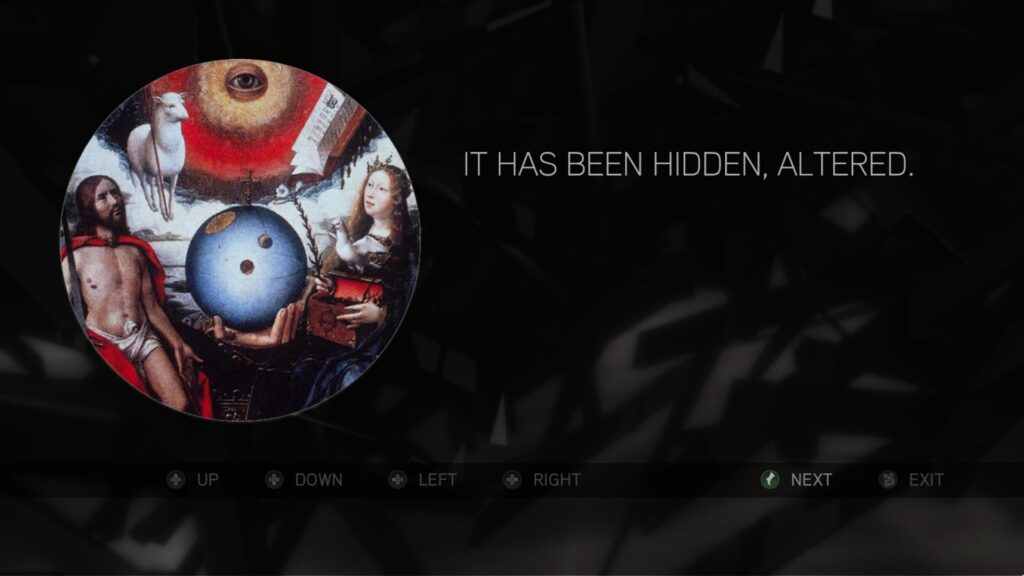
Then, once the image shows the full painting, move the cursor to the eye at the top part of the painting.
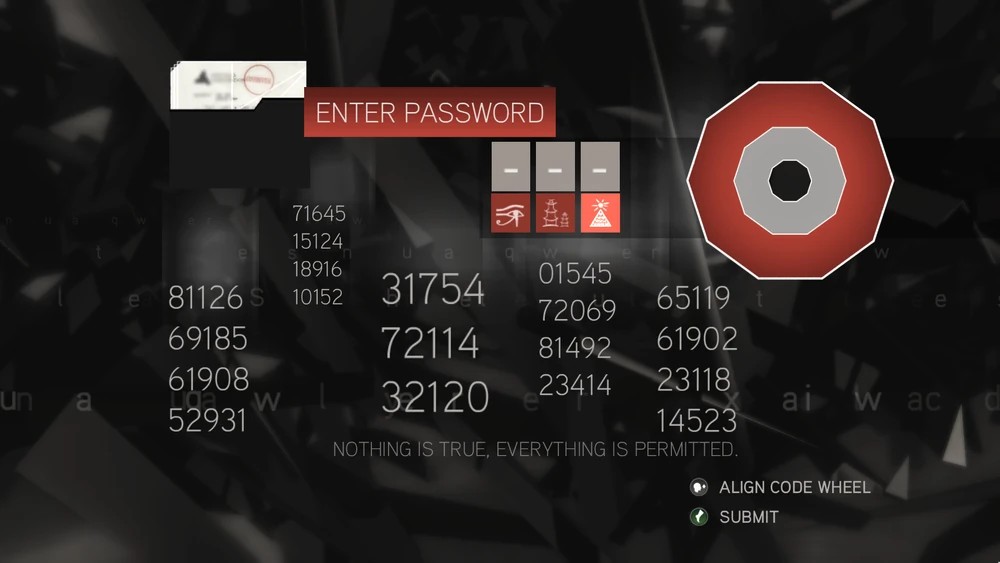
For the second phase follow the Assassin’s motto “Nothing is true, everything is permitted” as shown in the bottom part of the screen. This means you can enter any code, as it has no right or wrong answer.
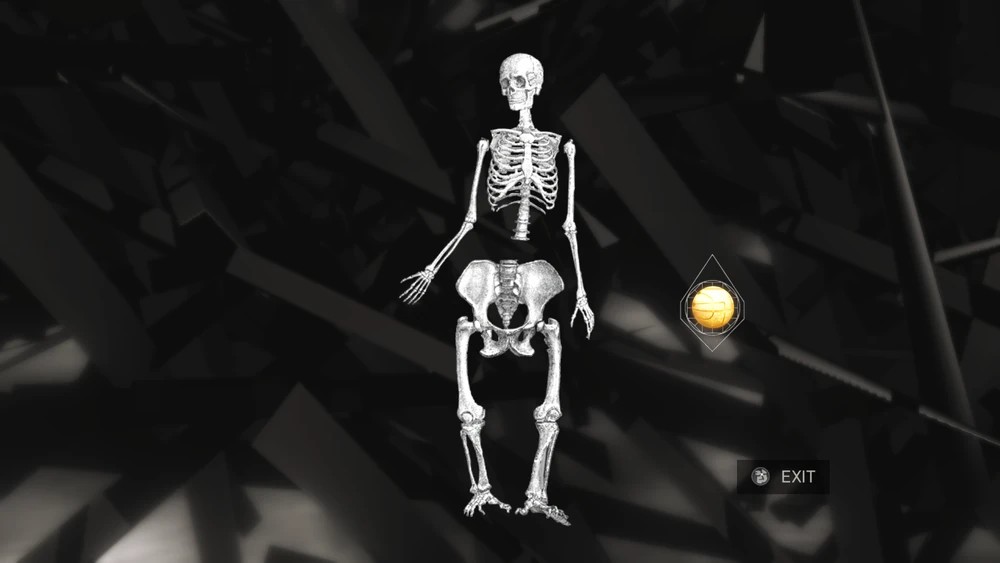
Lastly, for the third puzzle you’ll need to reconstruct the image of the skeleton into a human one.
Complete All Glyphs And Discover The Truth
Find all glyphs and complete all puzzles to find the truth. Or should we say ‘part of it’? The glyphs start in Assassin’s Creed II, but continue to appear in Assassin’s Creed Brotherhood and Revelations, as we accompany Ezio and Desmond on their journey.
Are you an Assassin’s Creed II Fan? Now you can add this and other video games to your gamer CV in gamers online and find new gamer friends to share interests and strategies.
Stay tuned for our next Assassin’s Creed Brotherhood Glyph Guide.
Game on!🗡️